Table of Contents
What Is A Branch?
A Branch is a physical location for your company from which you will perform your Services. Each Branch will have a defined service area that is generated by BugSquad, which will limit orders to a 25 mile radius around your Branch.
If you have multiple Branches, customers who place an Order on your website will be routed to the Branch closest to their address. Keep in mind that you are charged by us based on the amount of Branches you have that are Active. You can add and Activate/Deactivate Branches at any time.
Branches Tab
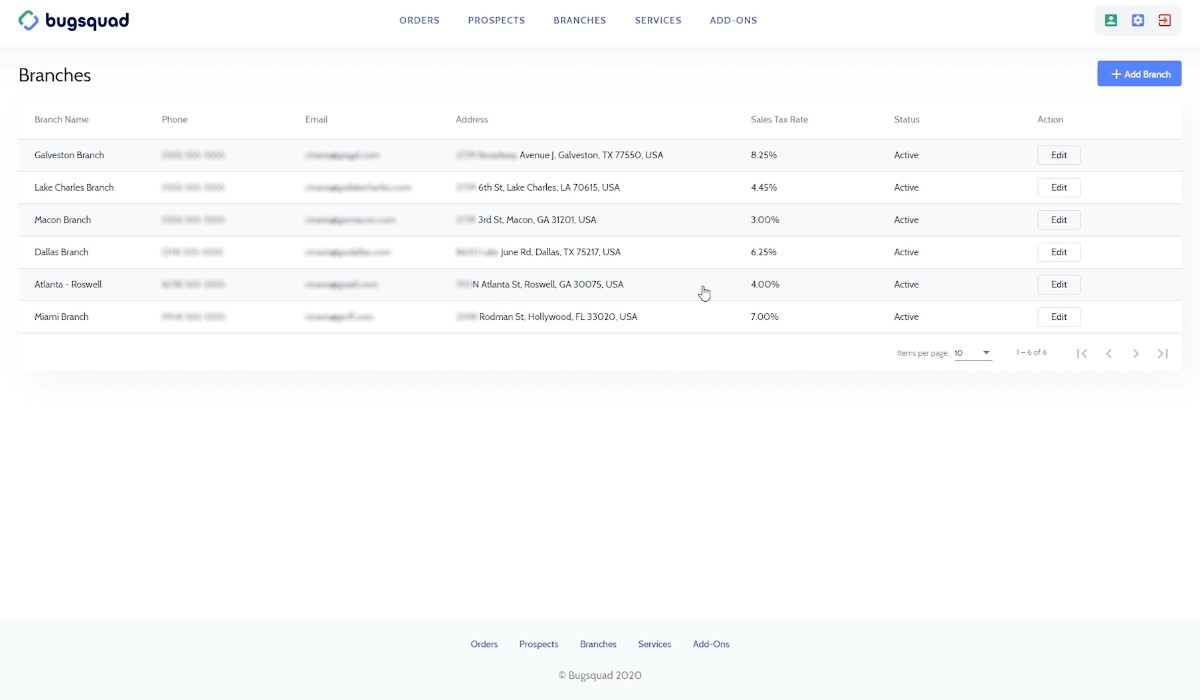
The Branches tab is where you will see each of the Branches you have set up for your business in a table/grid view.
You will be able to see each Branch's name, phone number, email, address, sales tax rate, and it's status.
If you need to edit a Branch, click the "Edit" button in the "Action" column.
Add A Branch
Each Branch will represent a location for your company with a defined service area.
You can have as many branches as your business requires, and you can freely add or deactivate Branches at any time.
Keep in mind that BugSquad's pricing structure is based on how many Branches your business has. Your subscription to BugSquad will be updated immediately when a new branch is added (enabled) or an existing branch is disabled. All subscription charges are prorated.
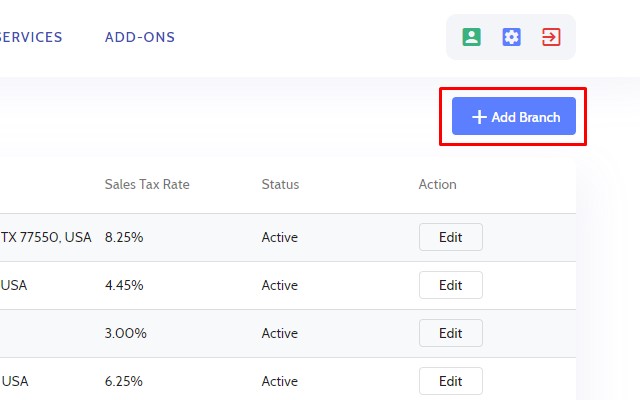
Add a branch by clicking the "Add a Branch" button.
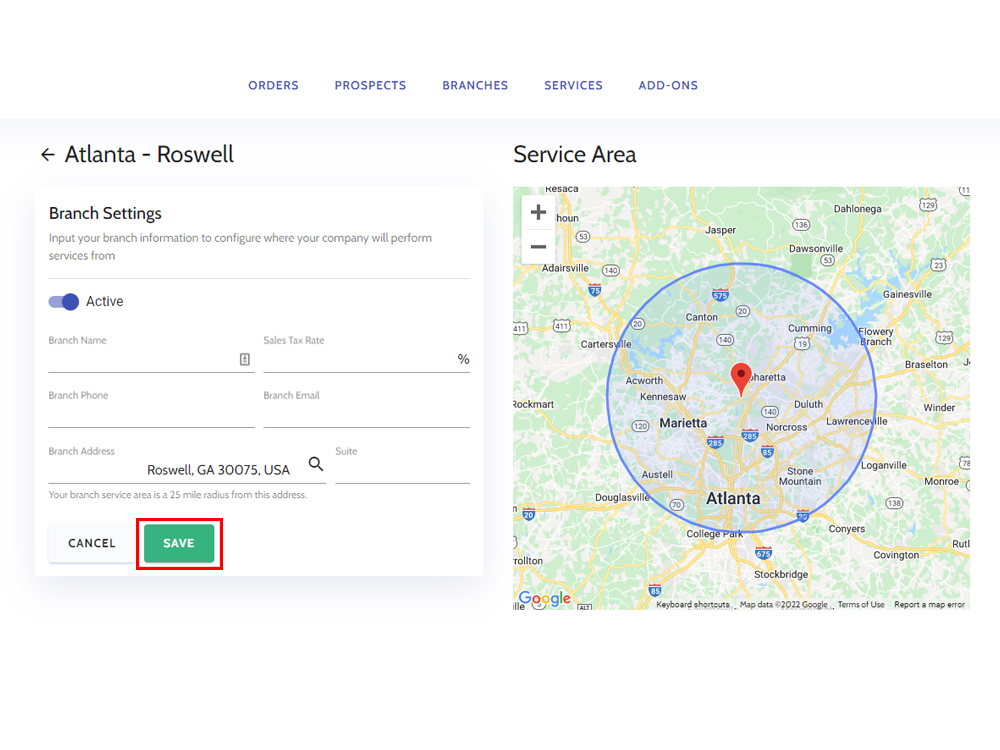
Branch Settings
This is where you will input your Branch information and configure where your company will perform services.
You can toggle whether a Branch is active or inactive in this section. Click or tap the toggle switch to change the Branch's status. Once you save your changes, the new status takes effect immediately.
When a Branch becomes active, customer orders within the Branch's service area will be routed to that Branch. When a Branch is deactivated, customer's within that service area will no longer be able to place orders.
The status of your Branch(es) will be reflected in your next monthly invoice from BugSquad. The price shown will be pro-rated based on how long your Branch(es) have been enabled or disabled.
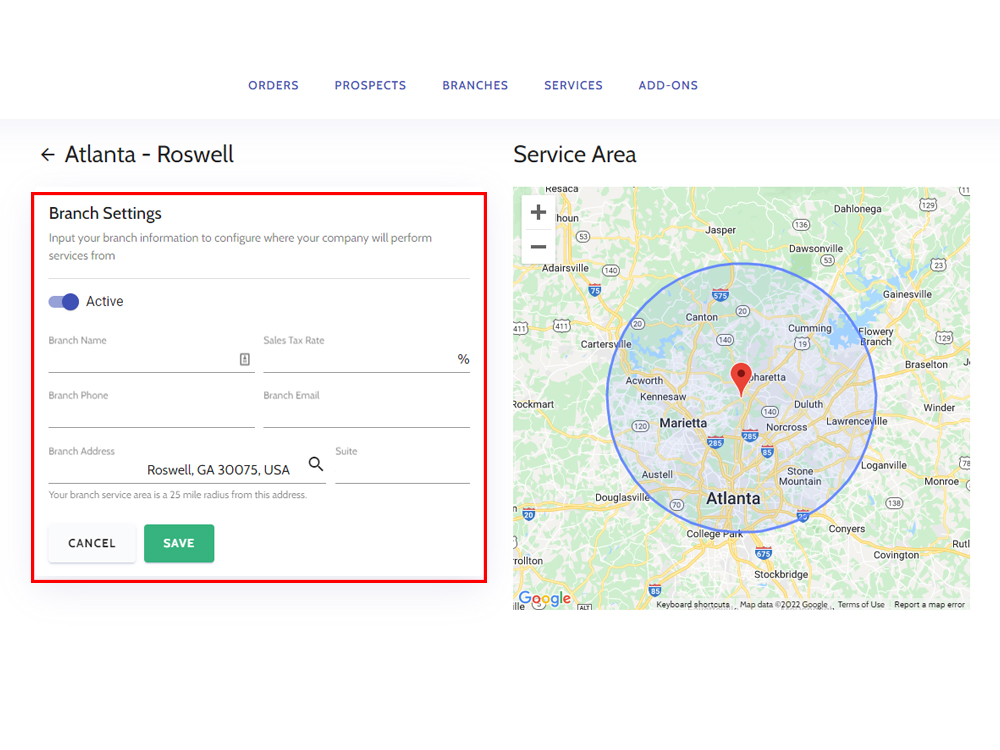
Within Branch settings, you will also input your Branch's address and contact information.
Each of these fields are important because this is how your customers and BugSquad will be able to interact with your business.
The Branch name is for your internal use, but the phone number and email address is what your customer will see when they receive their Order Confirmation email. This is also the information that your provide for them to get in contact with you.
You will also input the Sales Tax Rate for the municipality in which your branch is located.
Branch Service Area
Once you input your Branch's address, a map of the service area will be updated.
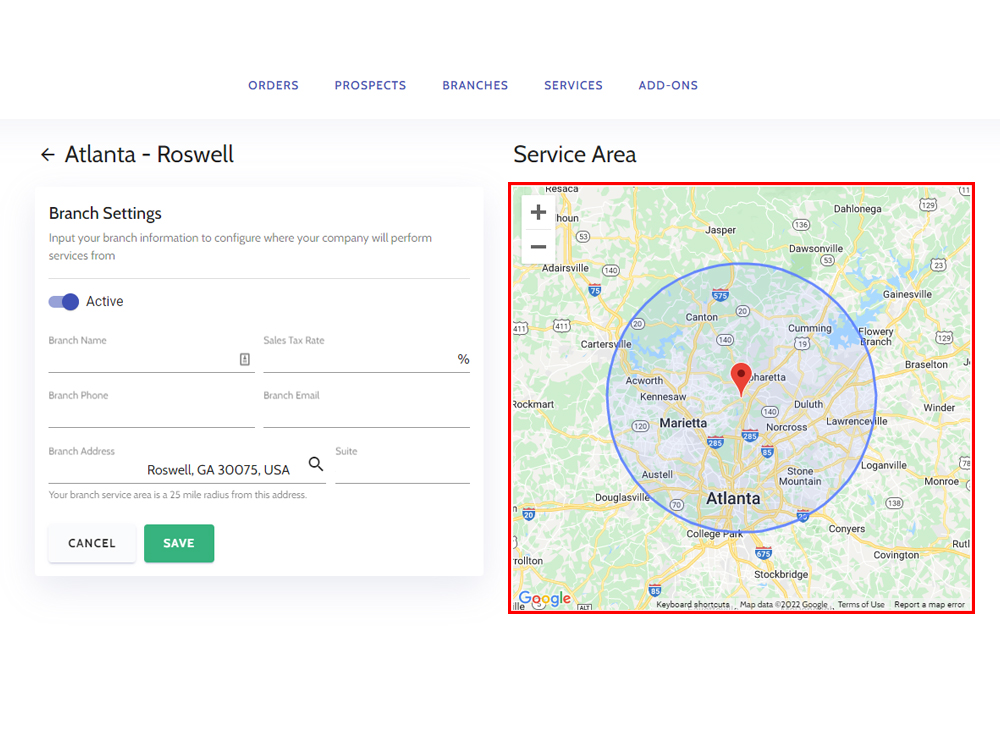
BugSquad limits orders to a 25 mile radius around your Branch and routes customer orders to the closest Branch.
The service area for your Branch is represented by a Google integrated map that will display a blue ring and a red pin the center of the ring.
The red pin represents the location of your Branch. The blue ring is the 25 mile radius that BugSquad intelligently generates from the Branch's location.
Save Your Branch
Once your Branch is set up, hit the SAVE button.
The newly created branch will be seen in your Branches tab. You can make as many changes as you need; just click Edit to be taken back into the branch's set up page.
